Ktmito 380
 Jeram
25 Oct 2011
Jeram
25 Oct 2011
 Tallus, il Oct 23 2011, 05:13 AM, ha scritto:
Heh Great job Jeram. I see in your work a lot of passion that's very cool. Please tell me how old are you? AND WHERE THE HELL YOU HAVE THE MONEY FOR IT ALL PARTS!?  xd
xd
xdIm 23, final year civil engineering student.
to describe my income as an analogy... Im running on fumes haha
but the projects have cost me alot less than you would think
The KTMito380 project owes me less that what it would cost to buy a brand new mito 525sp or a 2005 Yamaha R6.
the CRM250SM project owes me alot less, perhaps half the cost of the mito.
Alot of money was saved by being patient and waiting for bargains to pop up on ebay, I also made some money selling parts from bikes that I didnt need, but most of all the work that I need to get done by the professionals is often discounted or free because they are usually friends.
with the project I guess I wanted to prove that you could build a fast, unique bike without spending a fortune.
MORE PROGRESS TO COME ONCE I FINISH MY EXAMS!

Jeram
06 Nov 2011
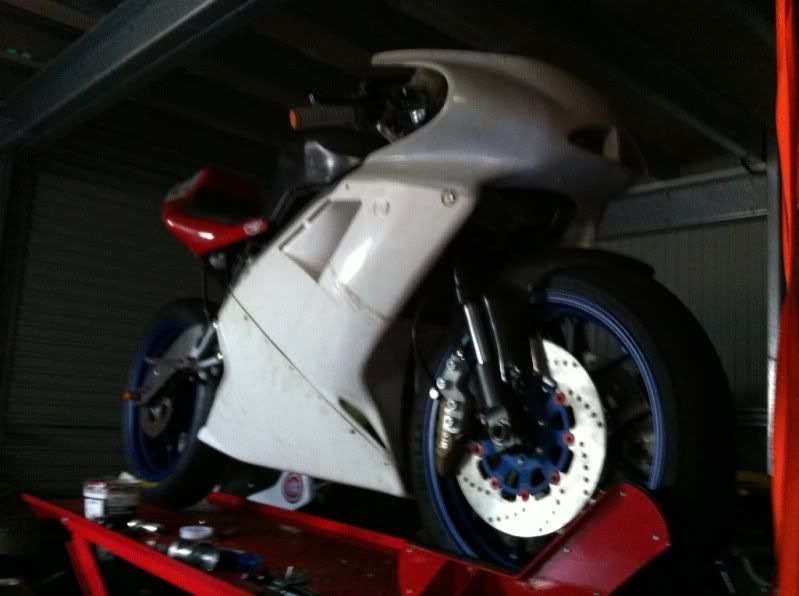
I found a MITO 525SP PISTA subframe and seat unit on ebay last week and had to buy it before someone else did!
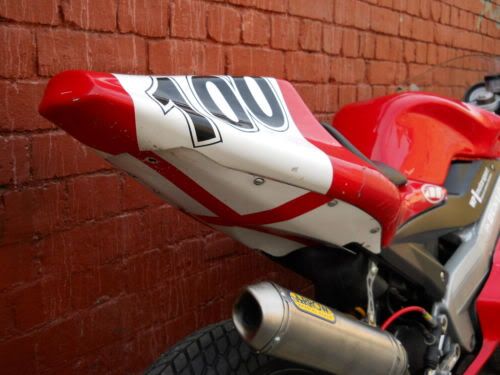
that is a very sexy rear end!... reminds me of a cross between a Cagiva 594GP and a Ducati Desmo.
I should have it in about 2 weeks and then I can fit it when I next travel up to nextcastle in December.
things to do on next visit
-mount the subframe and seat
-mount the shock
-get the rear wheel and brake fitted properly and fit an old tyre so the bike can roll around the garage
-get the engine mounts CNC'd
-make a new pipe design from cardboard and then send off to the laser cutter.
-
Jeram
06 Nov 2011
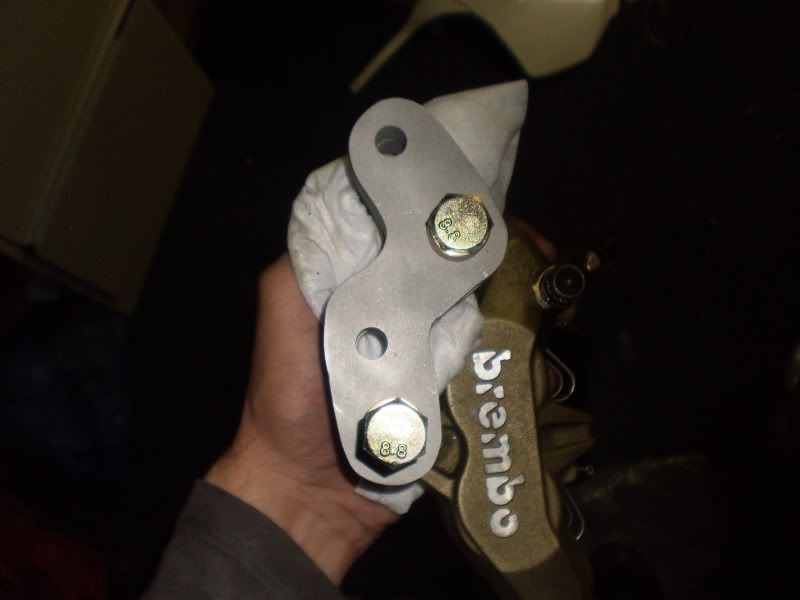
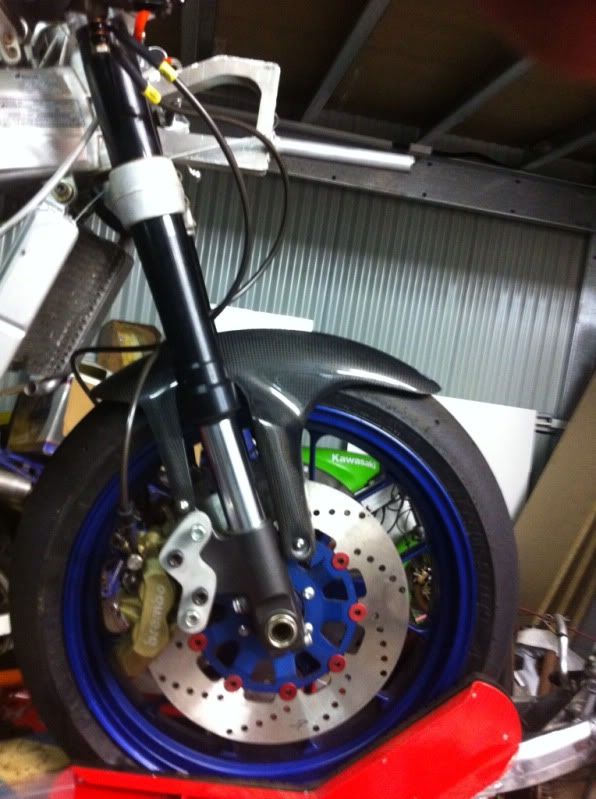
oh and got the front brake brackets made ages ago but forgot to post up
 motoracer15
26 Nov 2011
motoracer15
26 Nov 2011
a quanto pare non sono stato l'unico ad avere l'idea di trapiantare il motore KTM380...... peccato che ho la moto intera e devo poi lasciarla senza motore -.-'
ma se riesco a trovare un motore 300 per la mia enduro, questo supermono sarà il mio prossimo progetto!
ma se riesco a trovare un motore 300 per la mia enduro, questo supermono sarà il mio prossimo progetto!
motoracer15
26 Nov 2011
Jeram, il 06 November 2011 - 00:46, ha scritto:
oh and got the front brake brackets made ages ago but forgot to post up
don' t use 8.8 bolts for mount brake calipers and brake disks! Is dangerous! use at least 10.9, or 12.9
Jeram
15 Jan 2012
No 8.8's are used anywhere on the bike. They are all a minimum of 12.9.
Even though most people like to say 10.8 and 12.9 are the ONLY safe bolts to use, I believe that If I did the calculations we would find that 8.8 grade 10mm bolts are more than fine to use.
From doing bolt shear calcs last year for 6 months I was surprised to find the small difference in shear capacity between the grades of bolts,
However yes you are right, there is nothing wrong with using the best available! and that is what I usually do when cost isnt a huge factor.
These 8.8's are just two bolts I had lieing around that I used to keep everything bolted together so nothing was lost.
Bike has progressed recently, and I will be working on the bike for 5 days straight at the end of the month
we're hoping to start the KTMito engine for the first time in just 2 weeks.
That means we have to work very fast to build the pipe, refabricate the engine mounts that I redesigned last week, wire the bike up and finish the engine off. Shouldnt be too hard as weve had a very long time to contemplate and plan this
Messaggio modificato da Jeram il 15 January 2012 - 03:45
Jeram
15 Jan 2012
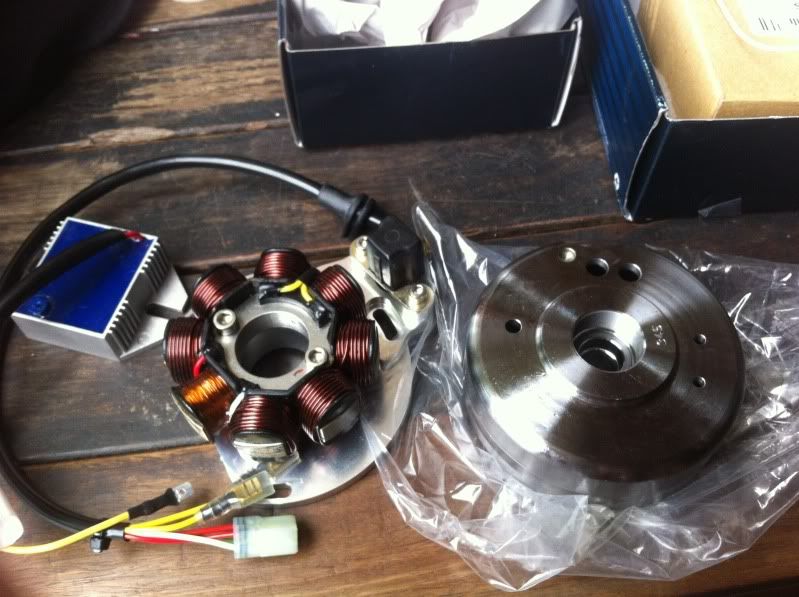
high output stator and flywheel that I had made
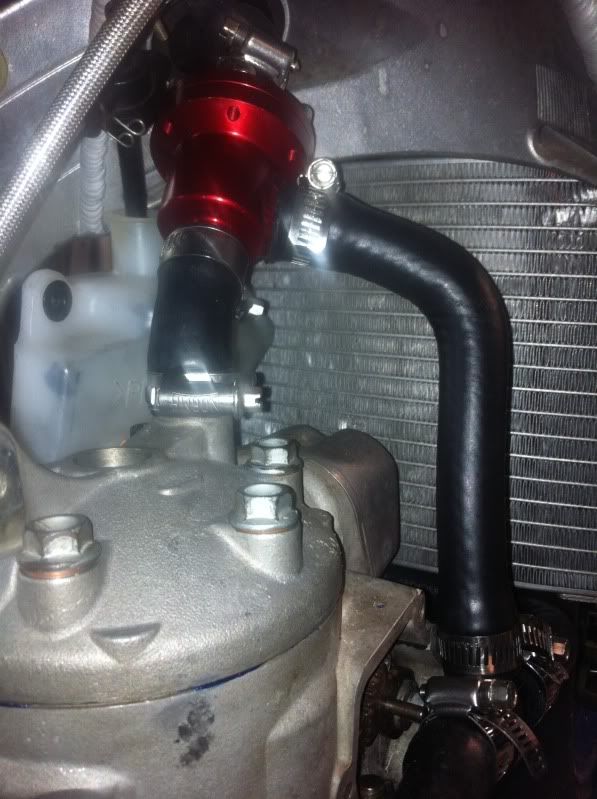
plumbing is organised

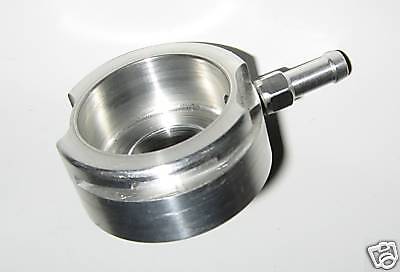
had a CNC radiator filler cap made
and got a gear shift lever for the first ride, will likely cut it up and connect it to the mito gear leave/linkages

we are also experimenting with a 300 gram battery
plumbing is organised
had a CNC radiator filler cap made
and got a gear shift lever for the first ride, will likely cut it up and connect it to the mito gear leave/linkages
we are also experimenting with a 300 gram battery
Jeram
31 Jan 2012
heres what we got up to this weekend
All in all it was a pretty productive weekend but a few setbacks stopped us from getting the bike fired up.
1. putting the 'bling' orange clutch master cap on removed the magura cap which warned not to use brake fluid.
brake fluid was accidentally placed in the MC which ruined the seals preventing any hope of starting the bike.
2.Dropped the cluch shaft double needle roller on the floor, losing several rollers.
couldnt find an exact match so had to machine a couple new rollers from similar rollers.
3. my ankle exploded on the 3rd day, swelled up like a balloon and I could barely walk for the remainder of the trip...
so yeah, considering the above I think we did pretty damn good
First off we finished the front brake system by installing the 19mm forged master cylinder, connecting the braided lines, and installing high tensile bolts/washers on the callipers
Most insanely powerful brakes Iv ever felt, true one finger racing braking

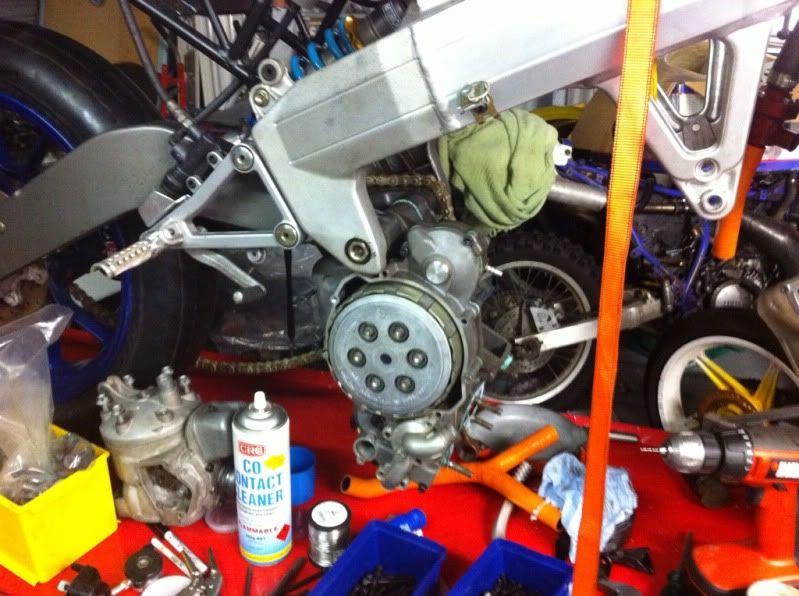
engine cases were again split open to investigate a gearbox issue, turned out to be the shift forks/drum had derailed
Luckily an engine removal is quick and easy, four bolts to swing the engine down for quick/easy top end work and slide the swingarm pivot half way out to drop the whoe engine.
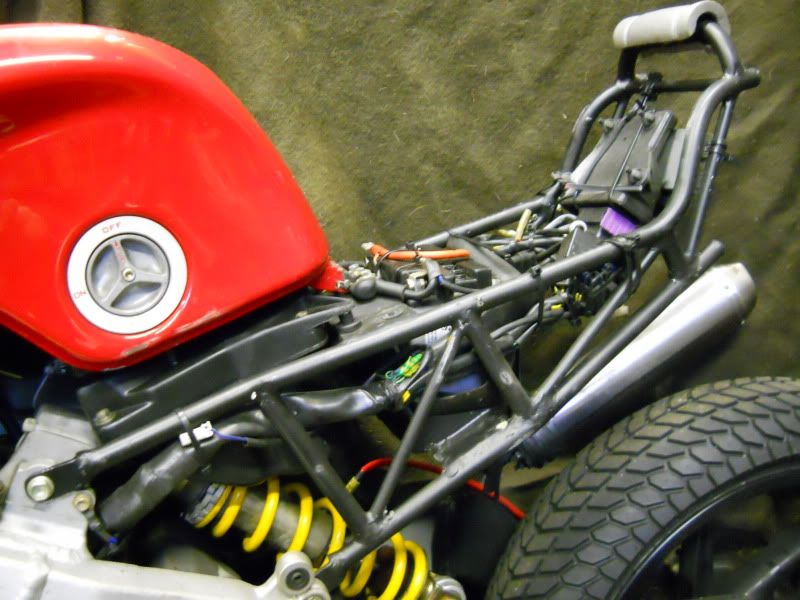
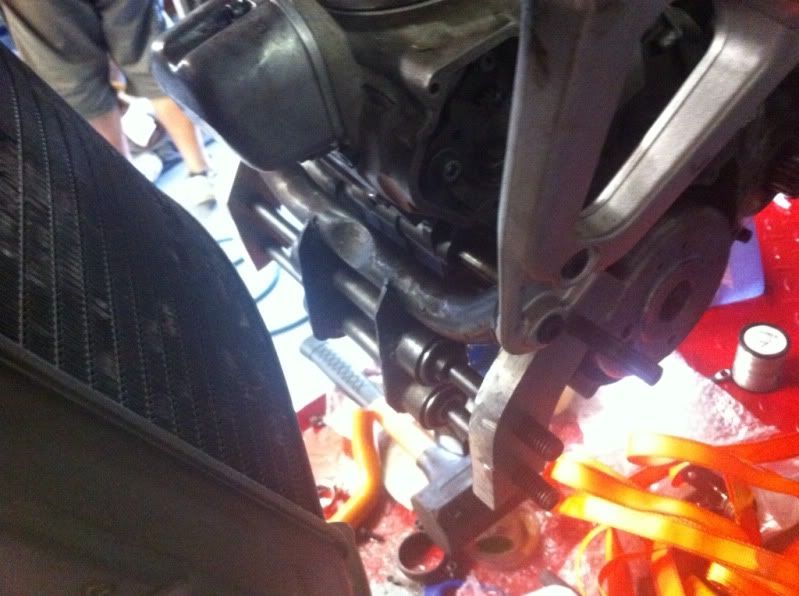
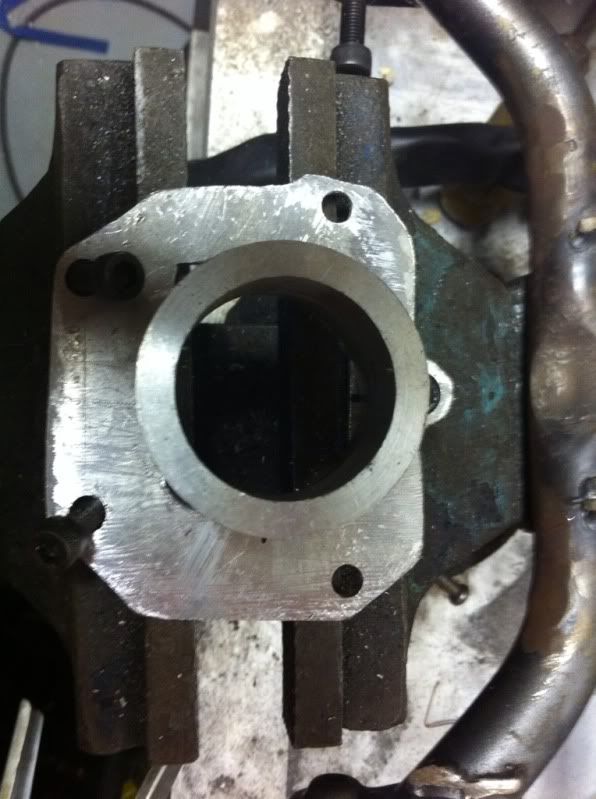
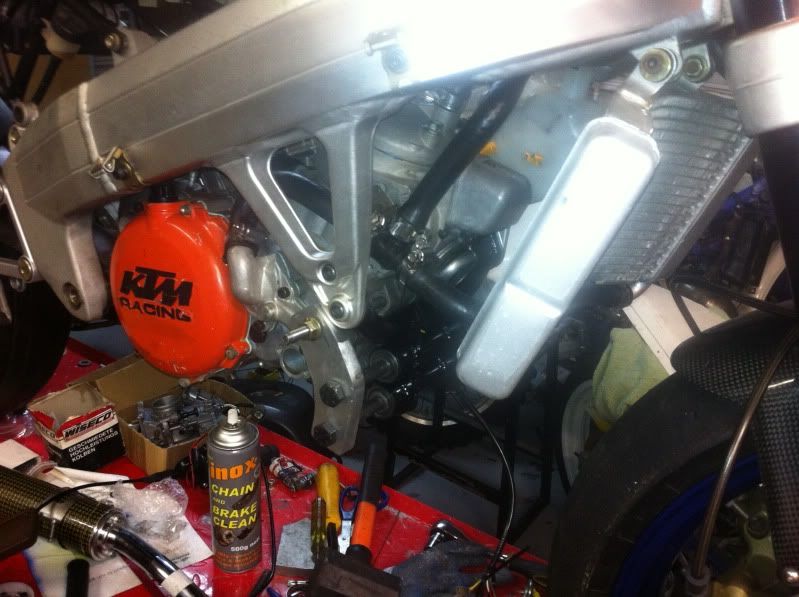
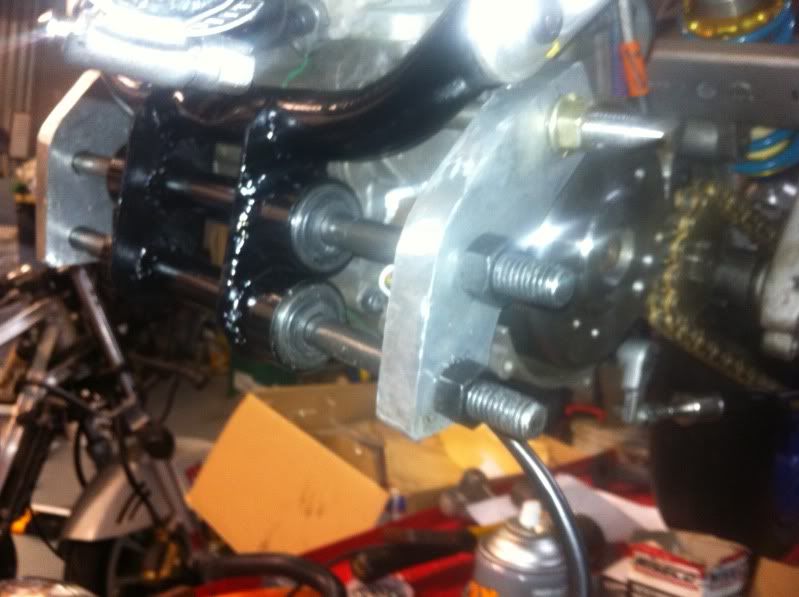
Im happy to report that my new engine mounts look like they will work amazingly.
They are super firm but have a surprising amount of dampening flex when required.
It consists of a bar which runs through the front mount of the engine cases, this bar connects to an aluminium mount on either side of the engine which then passes all forces and vibrations through half inch bolts and into the four independant dampeners before tranfering the loads to the frame rails.
here is a picture from earlier in the weekend before finished
POST 2/3
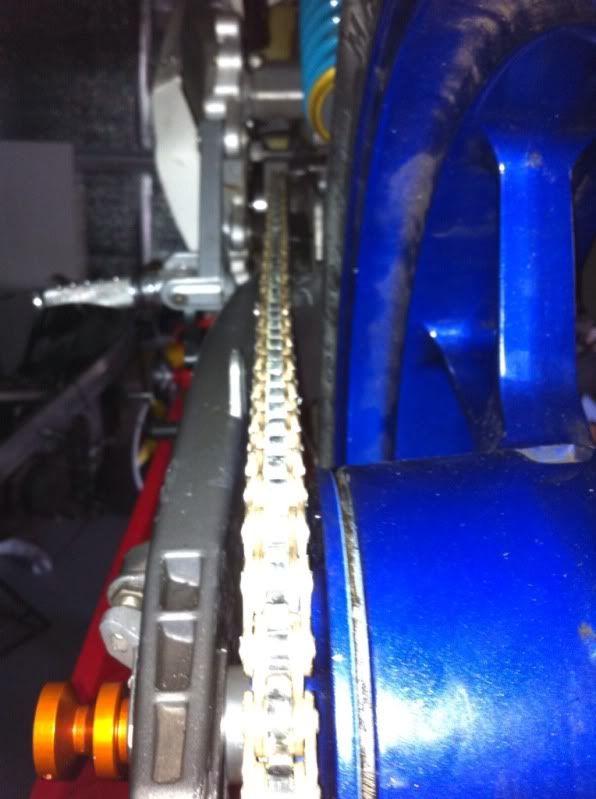
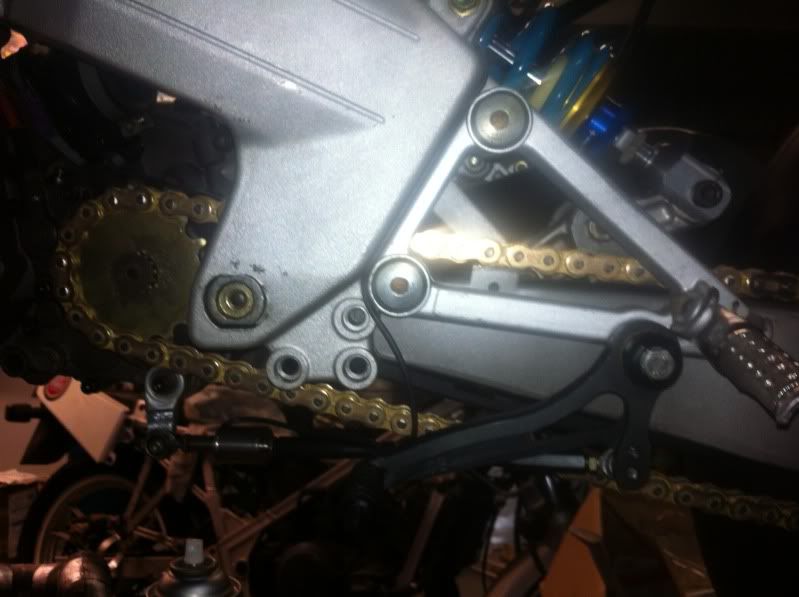
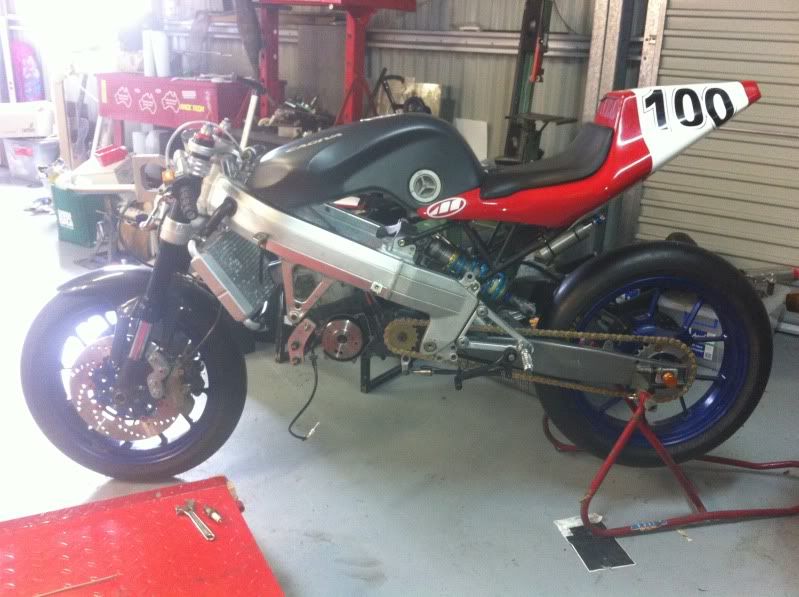
chain installed and aligned with a laser... is absolutely spot on!
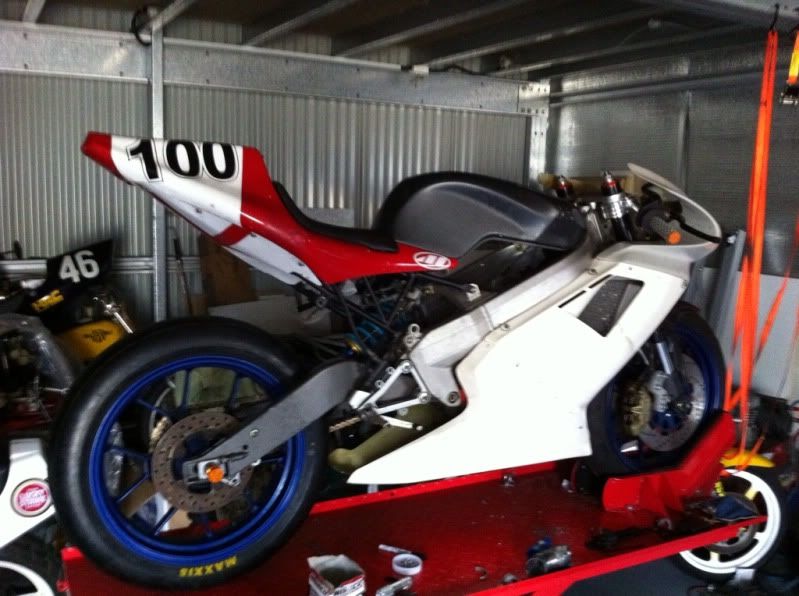
engine back in the frame, and bodywork installed so that the expansion chamber could begin being fabricated.
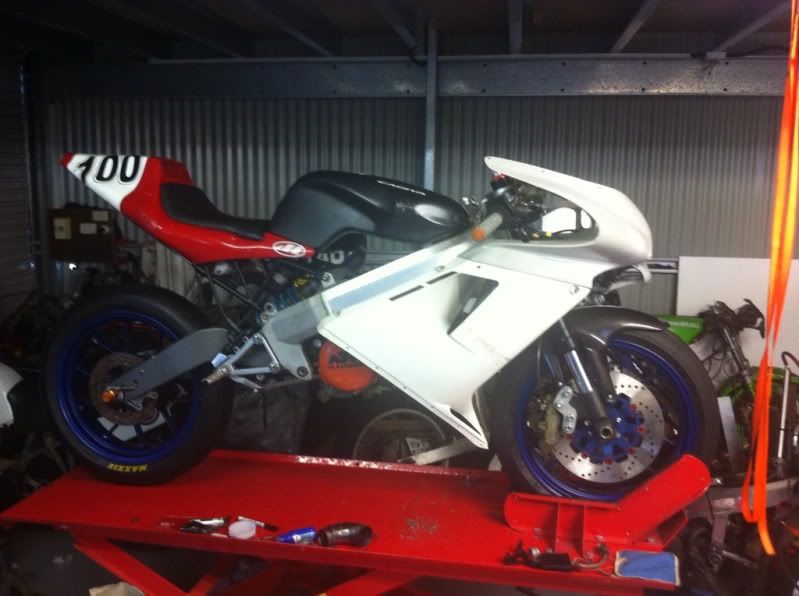
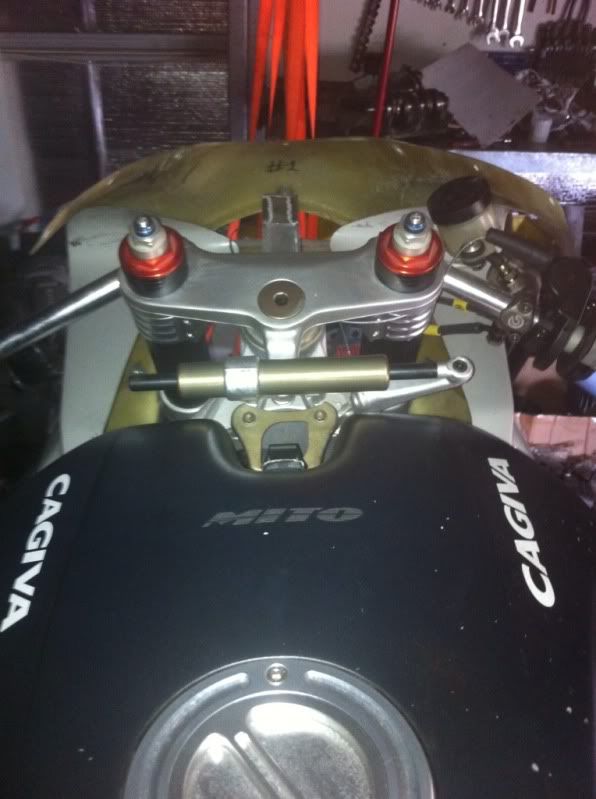
Minimalist cockpit/dash area. just needs to have the micro LED tacho installed
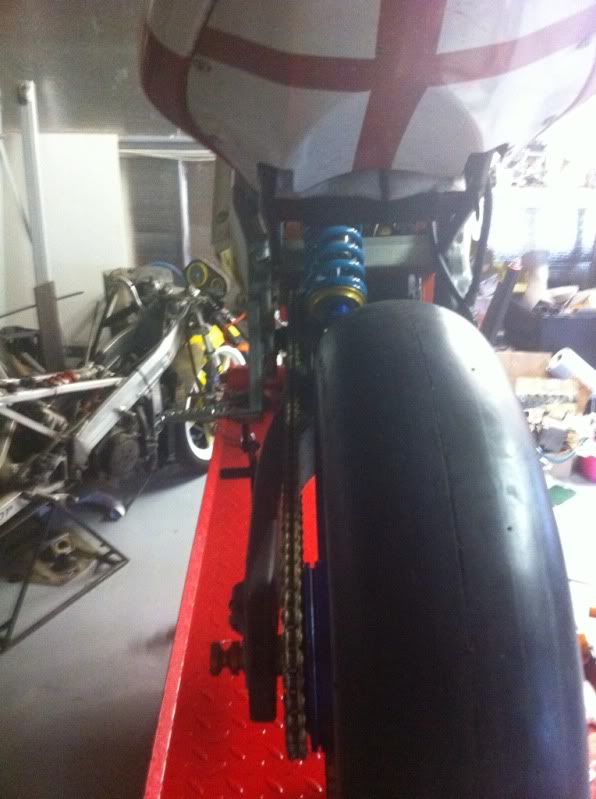
Nitron shock installed
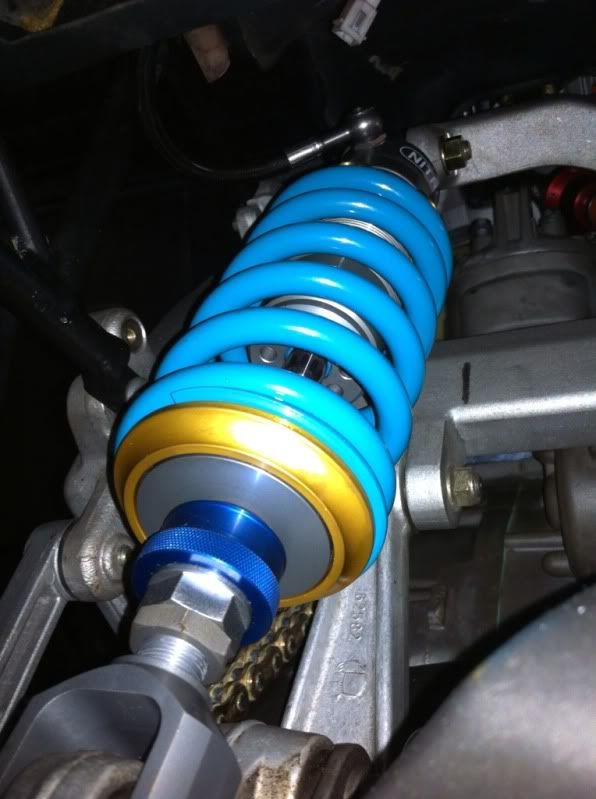
I really like the look of the slick, the race tail/tray and the nitron race shock...
gives me an ear to ear grin just looking at it

just some more pictures
POST 3/3
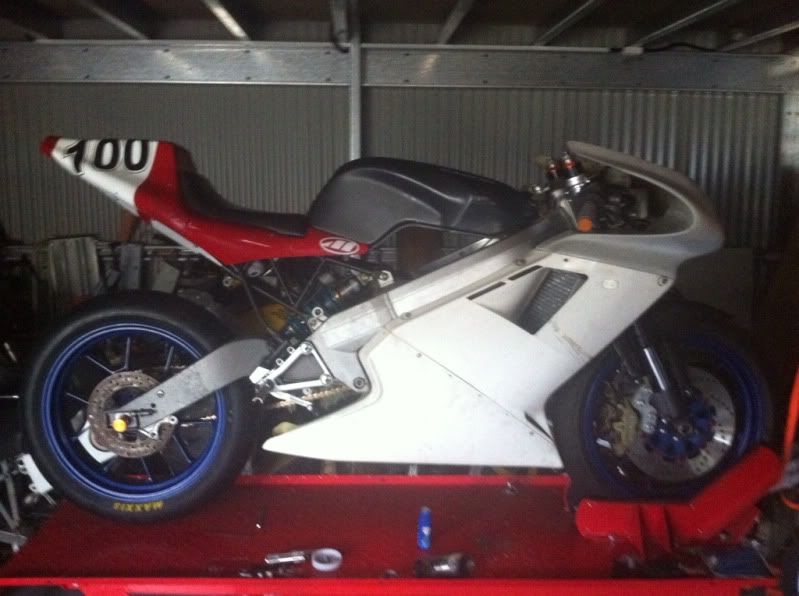
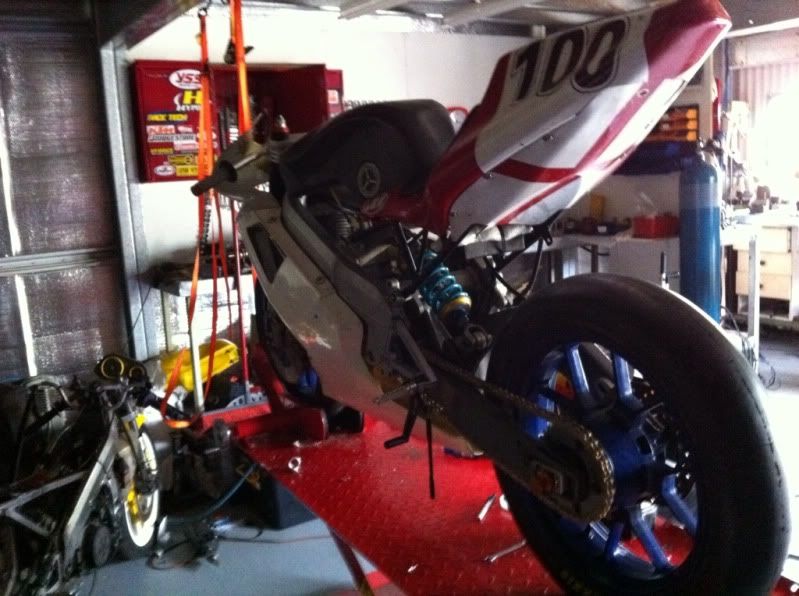
really reminds me of the Cgiva GP593/594 from this angle
couldnt find the OEM intake boot so begun fabricating one from alluminium.
didnt quite get it finished but it is a short/straight intake boot with a tapering ID, from 41.5 round at the carb to almost 60mm rectangle at the mouth of the Vforce-2 reed block
And a quick walkaround video of the bike
Major things to do now before bike can be taken for a ride:
-Finish the Exhaust
-Rear brake
after seeing that there is plenty of clearance with the 4.25 rim and a 160 slick we are not looking at fitting a 5.5 inch ducati 999 rear wheel with a 165/17 250GP slick.
Messaggio modificato da Jeram il 31 January 2012 - 05:55
All in all it was a pretty productive weekend but a few setbacks stopped us from getting the bike fired up.
1. putting the 'bling' orange clutch master cap on removed the magura cap which warned not to use brake fluid.
brake fluid was accidentally placed in the MC which ruined the seals preventing any hope of starting the bike.
2.Dropped the cluch shaft double needle roller on the floor, losing several rollers.
couldnt find an exact match so had to machine a couple new rollers from similar rollers.
3. my ankle exploded on the 3rd day, swelled up like a balloon and I could barely walk for the remainder of the trip...
so yeah, considering the above I think we did pretty damn good
First off we finished the front brake system by installing the 19mm forged master cylinder, connecting the braided lines, and installing high tensile bolts/washers on the callipers
Most insanely powerful brakes Iv ever felt, true one finger racing braking
engine cases were again split open to investigate a gearbox issue, turned out to be the shift forks/drum had derailed
Luckily an engine removal is quick and easy, four bolts to swing the engine down for quick/easy top end work and slide the swingarm pivot half way out to drop the whoe engine.
Im happy to report that my new engine mounts look like they will work amazingly.
They are super firm but have a surprising amount of dampening flex when required.
It consists of a bar which runs through the front mount of the engine cases, this bar connects to an aluminium mount on either side of the engine which then passes all forces and vibrations through half inch bolts and into the four independant dampeners before tranfering the loads to the frame rails.
here is a picture from earlier in the weekend before finished
POST 2/3
chain installed and aligned with a laser... is absolutely spot on!
engine back in the frame, and bodywork installed so that the expansion chamber could begin being fabricated.
Minimalist cockpit/dash area. just needs to have the micro LED tacho installed
Nitron shock installed
I really like the look of the slick, the race tail/tray and the nitron race shock...
gives me an ear to ear grin just looking at it
just some more pictures
POST 3/3
really reminds me of the Cgiva GP593/594 from this angle
couldnt find the OEM intake boot so begun fabricating one from alluminium.
didnt quite get it finished but it is a short/straight intake boot with a tapering ID, from 41.5 round at the carb to almost 60mm rectangle at the mouth of the Vforce-2 reed block
And a quick walkaround video of the bike
Major things to do now before bike can be taken for a ride:
-Finish the Exhaust
-Rear brake
after seeing that there is plenty of clearance with the 4.25 rim and a 160 slick we are not looking at fitting a 5.5 inch ducati 999 rear wheel with a 165/17 250GP slick.
Messaggio modificato da Jeram il 31 January 2012 - 05:55

Jeram
31 Jan 2012
Correction... We ARE looking at fitting the 5.5 inch Ducati 999 rim.
Anyone used a 5.5 rim yet?
Anyone used a 5.5 rim yet?

Jeram
22 Jul 2012
yes, we hope to have the bike started in 3 weeks, I have purchased my flights and will be working on the bike for 5days (8-12 th August)
just need to finish the pipe, quickly wire the bike up, and plumb the coolant lines.
then we will start it up!
just need to finish the pipe, quickly wire the bike up, and plumb the coolant lines.
then we will start it up!

Jeram
13 Aug 2012
Ok, so heres the latest build report from the weekend.
First things first I quickly plumbed the bike, using the Two Stroke Shop bypass thermostat, the stock radiator, a T peice and bought a ton of radiator hoses from the local auto shop which had plenty of bends in them to use.
It all went together pretty well without any issues, just need to protect the rad hose above the exhaust header with some heat wrap.
Once that was done I moved onto the gear linkages, we put a KTM380 lever on the mill and made it into a sportbike still linkage lever, added a few rose joints, a DYNA quick shifter unit and a linkage rod.
done and shifts through all gears cleanly.
did a bit more work on the engine mounts, they just need a couple simple crush spacers made for them now, 99% complete
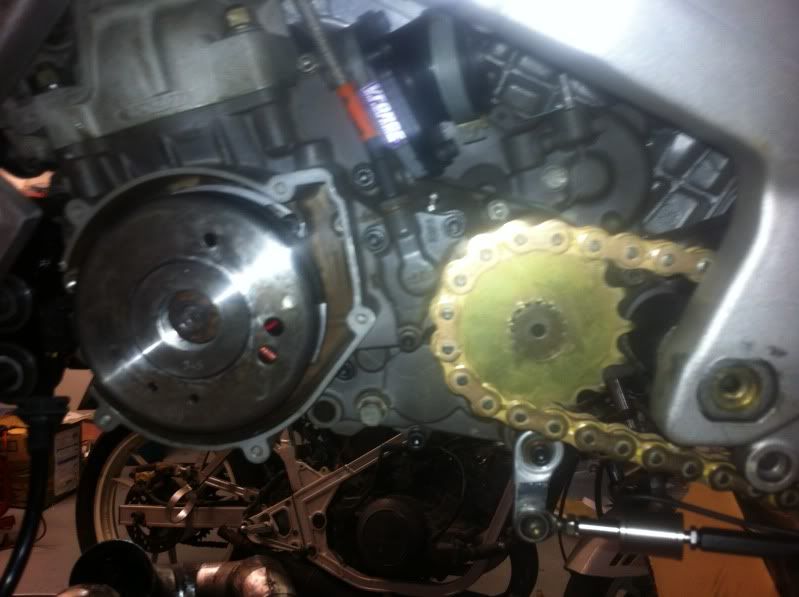
the cases were also ground down to accept the trail teck y2k stator and heavy flywheel. the stator cover will be left off the bike to allow it to fit.
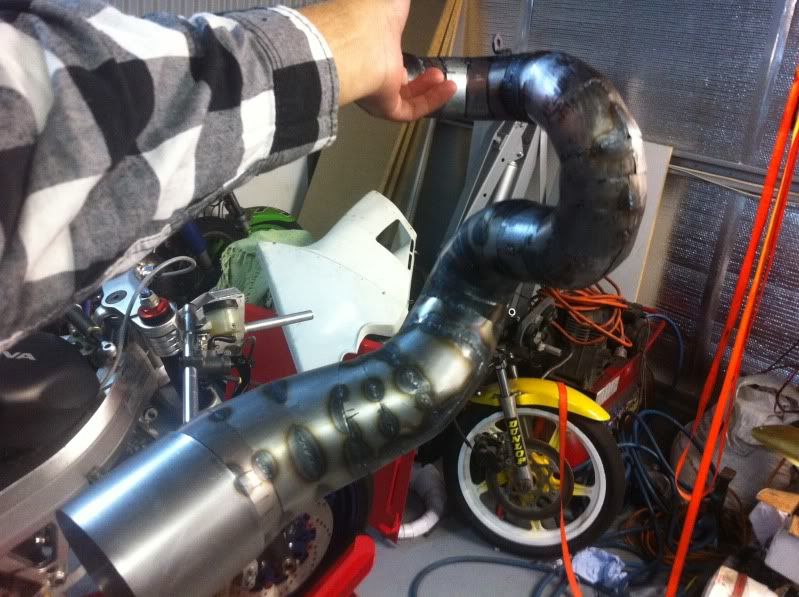
We then moved onto the main event. The expansion chamber which we've dubbed "the Anaconda"
After 3 long days we got 3/4 of the pipe done. Lots of template making, cardboard mockups, tin sniping, grinding, tack welding and circumfrence welding!
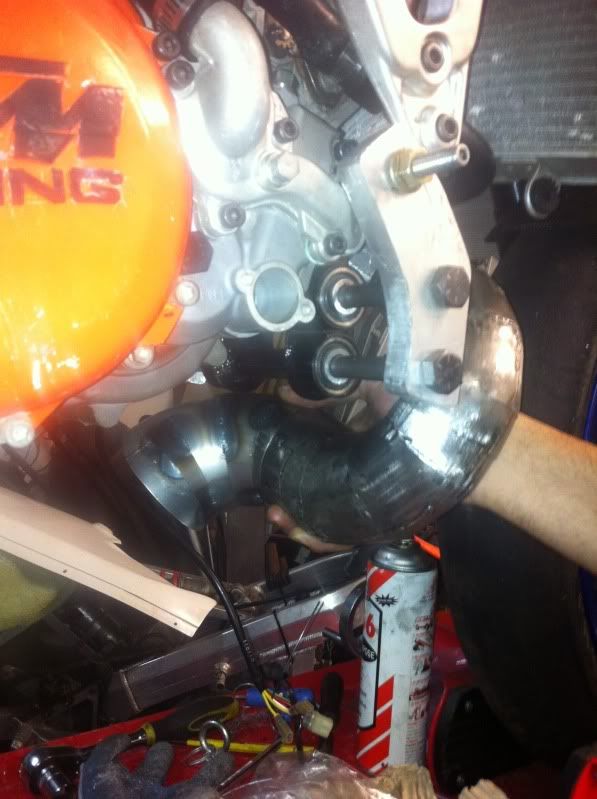
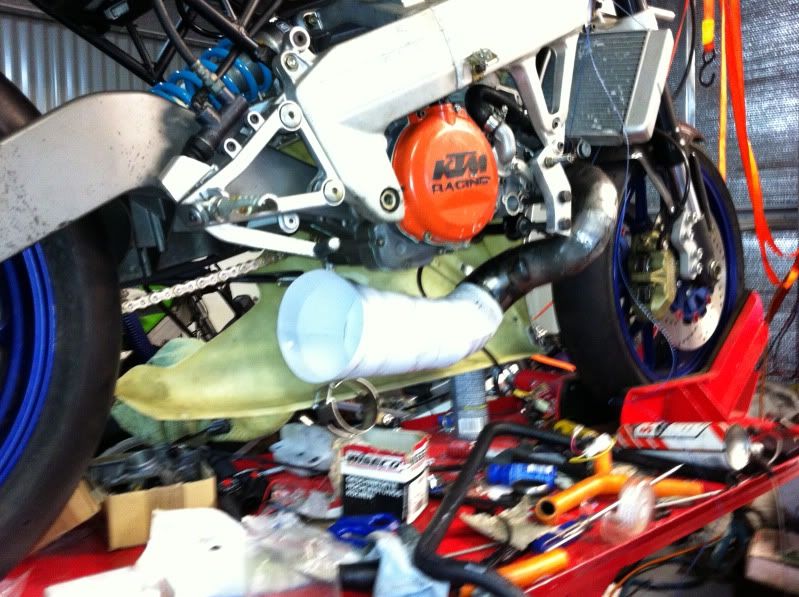
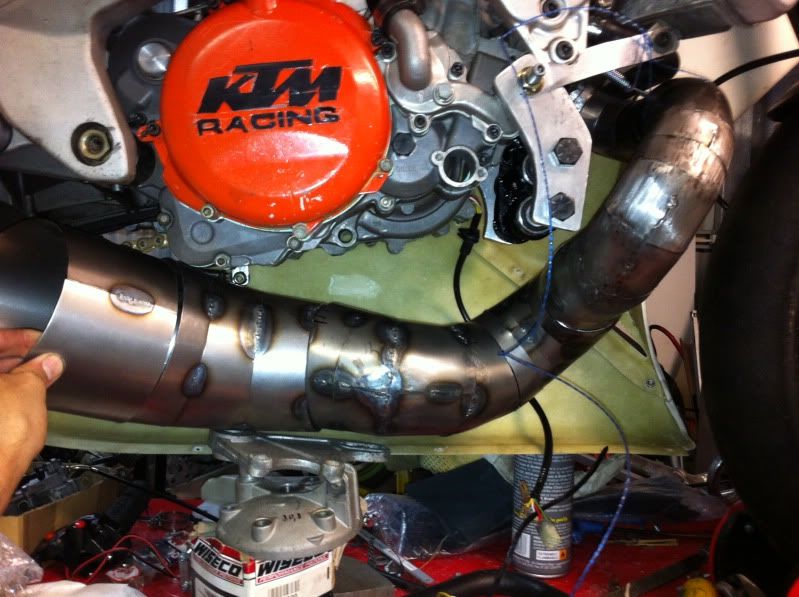
the belly segment has 400mm of welding in it alone.
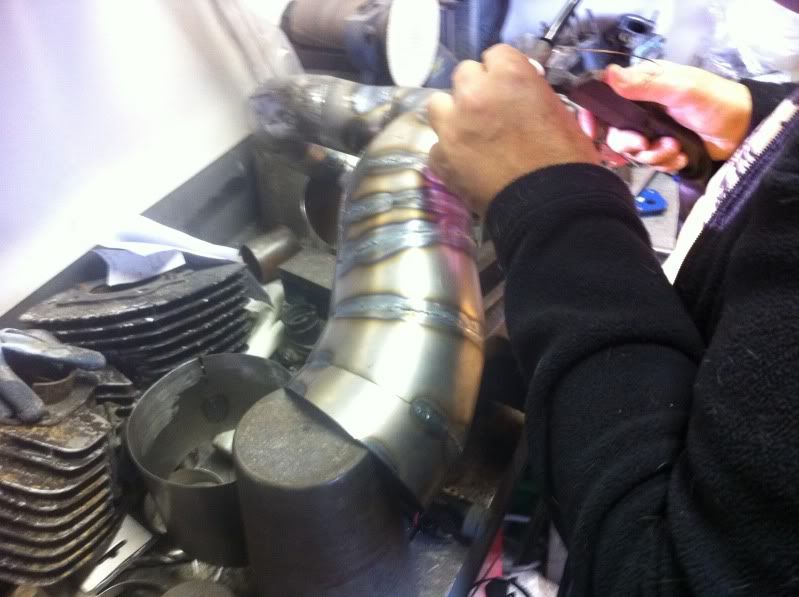
heres why its called the anaconda, can fit how many fists into its belly?

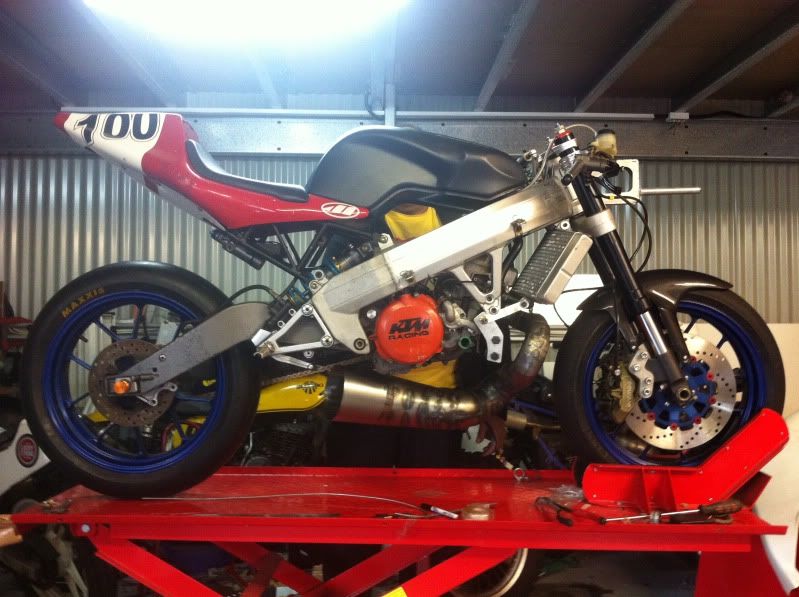
sitting back on sunday evening admiring our handy work so far.
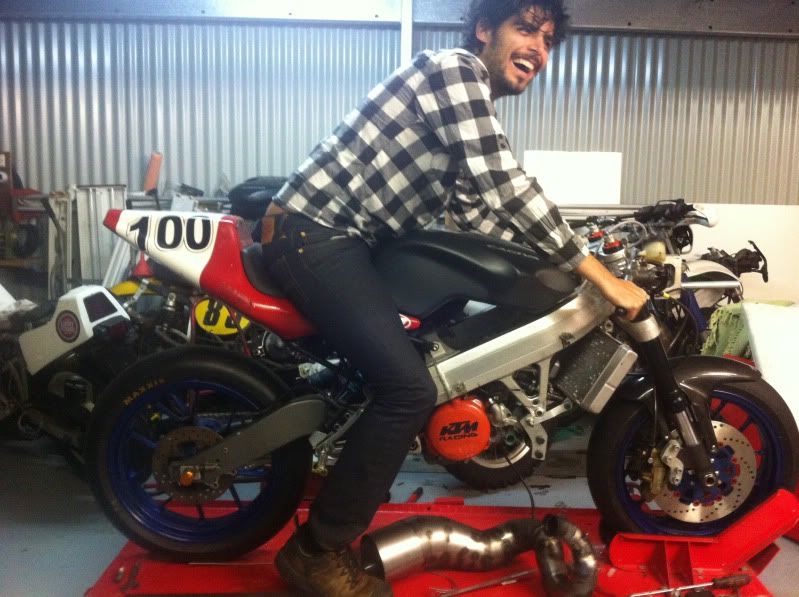
not much left to do now.
untill next time,
Jeram
First things first I quickly plumbed the bike, using the Two Stroke Shop bypass thermostat, the stock radiator, a T peice and bought a ton of radiator hoses from the local auto shop which had plenty of bends in them to use.
It all went together pretty well without any issues, just need to protect the rad hose above the exhaust header with some heat wrap.
Once that was done I moved onto the gear linkages, we put a KTM380 lever on the mill and made it into a sportbike still linkage lever, added a few rose joints, a DYNA quick shifter unit and a linkage rod.
done and shifts through all gears cleanly.
did a bit more work on the engine mounts, they just need a couple simple crush spacers made for them now, 99% complete
the cases were also ground down to accept the trail teck y2k stator and heavy flywheel. the stator cover will be left off the bike to allow it to fit.
We then moved onto the main event. The expansion chamber which we've dubbed "the Anaconda"
After 3 long days we got 3/4 of the pipe done. Lots of template making, cardboard mockups, tin sniping, grinding, tack welding and circumfrence welding!
the belly segment has 400mm of welding in it alone.
heres why its called the anaconda, can fit how many fists into its belly?
sitting back on sunday evening admiring our handy work so far.
not much left to do now.
untill next time,
Jeram

Jeram
17 Aug 2012
just finished ordering the last of the pieces we need to start the bike up.
few little engine plugs and covers, a few circlips, spark plugs, soundproofing foam to make a dash out of and some very small alluminium tube to make fairing mounts with.
The silencer has also been modified to look a little more 'GP' with a downward facing spout.
we have also found a new two stroke premix that I will be testing out, it is a ceramic/castor blend.